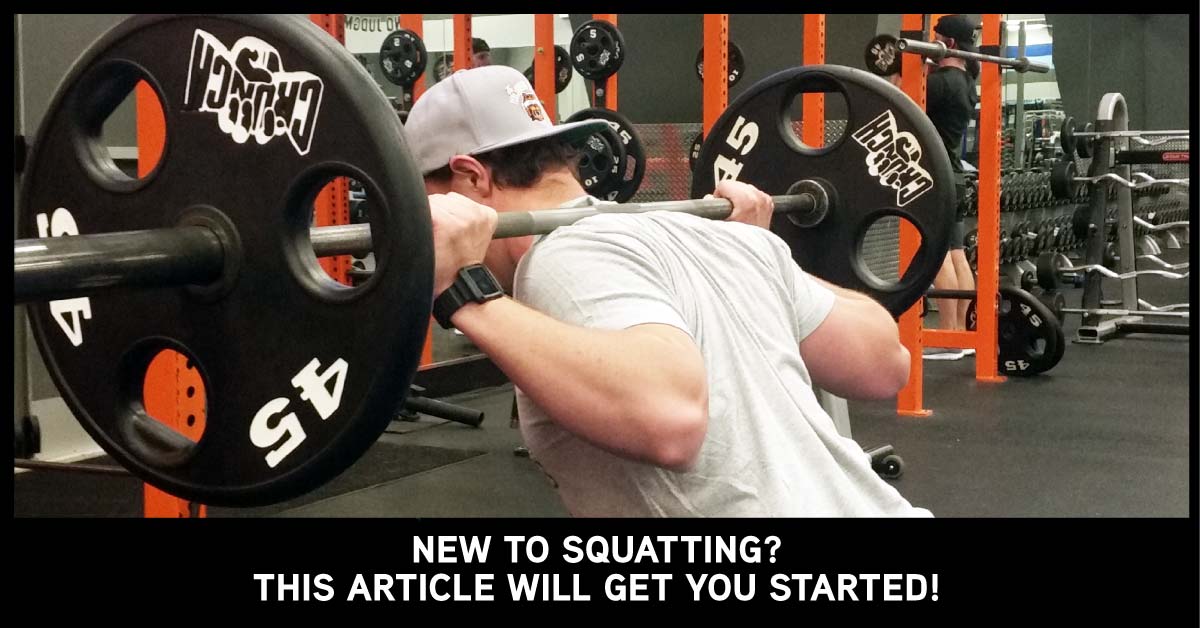
You’ve decided to start squatting.
Maybe you’ve seen the endless Instagram posts telling how great squats can be, or you’ve read how deep squats can protect against injury and make you stronger [1], or how they might improve bone health and prevent osteoporosis [2]. And you don’t need a study to know there are gains to be made, especially in the fan-favorite muscle group: glutes!
But putting a weight on your back and squatting down to where you haven’t gone since you were teething might sound a bit scary. And that’s understandable–it’s tough for many people to take the leap of faith without the help of an experienced coach or trainer.
That’s what this article is for!
This will be your expert guide providing everything you need to know about squatting.
Before going any further, it’s important to note that the squat is a basic, important human movement that almost everyone has done in some capacity. Google “Third-world squat” and you’ll see thousands of people squatting while eating, socializing, and even changing their baby’s diapers. So why dedicate an entire article to such a basic movement that seems so easy to others?
Because this is not a casual squat in the woods when there aren’t any bathrooms around. This is taking a relatively heavy load, putting it on your back, and executing the movement in the most efficient and safe way. And in today’s world of desk-sitting and car-driving, this task is not as easy as it may appear.
We start with the very simple (but not necessarily easy) task of… breathing.
Breathing
You need to breathe right if you want to move right. Many of our postural stabilizing muscles are also major contributors to breathing [3]. If these muscles aren’t contracting the way you want them to with something as simple as breathing, they probably won’t stabilize your spine the way they should when squatting. So, what does proper breathing look like? Imagine a soldier standing straight up with their chest out. They take a deep breath in, their chest puffs up even more, and their traps reach up to their ears. Now make sure you never look like this when you’re breathing!
This is improper, and unfortunately, it’s not far off from how many people breathe, especially when exerting themselves. This style of breathing uses accessory neck and chest muscles to expand the rib cage, which then turns off the abdominal muscles and may cause a greater risk of injury [4]. What you should do to breathe properly is optimize your “zone of apposition.” This is a fancy term that means not letting your ribs flare out. If you can keep your ribs from flaring, your diaphragm can drop down, which creates greater intra-abdominal pressure for your torso and spine[5]. This is exactly what you want—as much intra-abdominal pressure as you can generate to make your spine as stable as it can be.
This pressure that’s in your abdomen works to bolster the spine and resist shearing forces that are pushing your spine forward toward your belly button when you squat. The focus should be on deep diaphragmatic breathing while keeping your ribcage drawn down towards your belt buckle. Instead of writing out how to work on your breathing, we have a nifty video here to help instead.
Bracing
Now that you’ve reached self-actualization and awoken your diaphragm in the name of proper breathing, it’s time to tie this into bracing.
Bracing is another key piece to stabilizing your spine and making sure all of your joints are where they need to be when you squat. You’ve probably done it plenty of times in your life. To first feel a proper brace, take a deep (diaphragmatic if you know what’s good for you) breath and squeeze your abs hard as if you were about to take a punch while contracting your glutes (the classic pinch a penny if you need the visual). This is contracting all of your abdominals and pelvic muscles to put your spine in a neutral position. You should be doing this before every rep when you squat!
Bracing works to stabilize the spine, and helps other muscles contract via the law of irradiation. This is another fancy phrase that means when a muscle contracts hard (in this case your core muscles) other nearby muscles will contract harder when they fire [6]. In a way, it’s like your neural signals to contract your abs are “spilling over” into other muscles, allowing them to work even harder.
To many people, this means using the Valsalva method to create intra-abdominal pressure as they take a deep breath in and brace without letting any air out. The Valsalva method does cause a large increase in blood pressure, so there’s still some debate about whether it’s perfectly safe to perform. While the literature offers no concrete answer on its safety, we do know it effectively increases intra-abdominal pressure and stability [7]. It’s up to you to decide if it’s a technique you want to use.
The Setup
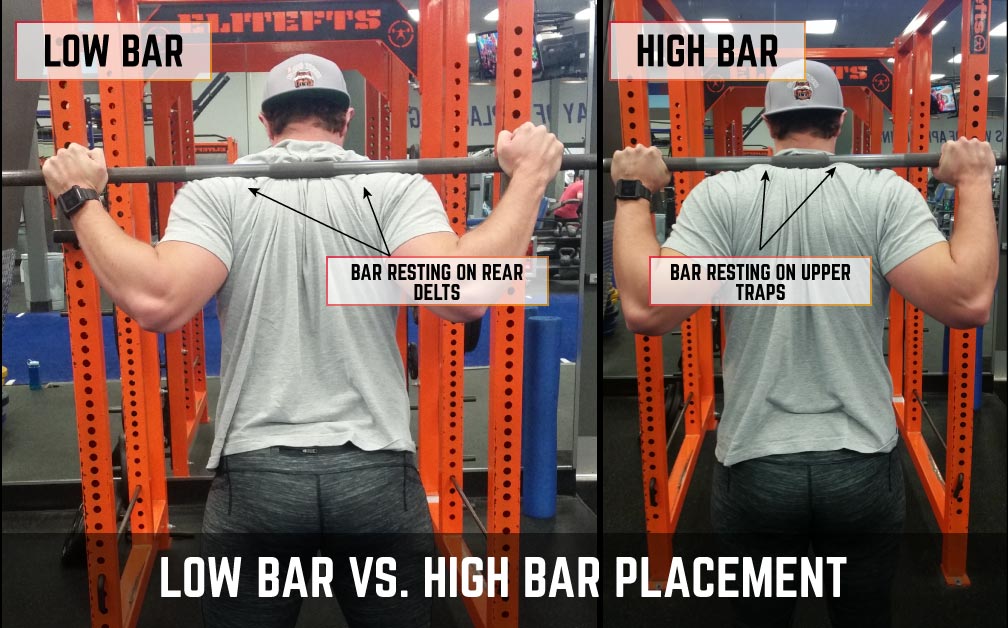
You’re breathing, you’re bracing, and now you get to the (almost) fun part… the setup. For starters, the question that gets tossed around the most is, “high bar or low bar?”. If you don’t know what that means that’s okay! The main differences are that a low bar position sets the bar below your upper traps, causing you to lean forward a little more when you squat. It allows most people to squat a little more weight – because “physics” and reasons we’re not going to get into in this article – but it’s definitely not a “natural” place to put the bar on your back [8].
On the other hand, you have the high bar position, where the bar is placed just a few inches above where the low bar position sits – on top of your upper traps. Because the bar is higher, you don’t need to sit as far back to keep the weight centered over your body, allowing most to squat more upright. This is also a more comfortable position as it requires less shoulder flexibility to hold the bar in place. Some people will tell you one or the other is better, but the only important thing is deciding which is more comfortable for you when you squat.
Now that you’ve chosen your bar position, the next part is setting your hand width. Keep your hand width as close together as you can without feeling like your shoulders are going to pop out of their sockets while trying to point your elbows down to the floor. This position will be different for everyone based on arm length and flexibility, but it allows for the greatest upper back tightness/stability (remember the law of irradiation) without being terribly uncomfortable. Aim to keep your wrists as neutral or straight as possible. Some like to wrap their thumbs over the bar and others like to grasp the bar. These are more options that you can play with and find what best suits you.
Now we can talk about one of the trickiest parts of the squat setup and the biggest reason people may feel they can’t squat deeply—hip and foot position. By now, it’s pretty well-known that hip-shape can vary greatly between people [9]. This is why individuals’ squats can look so different, and why one squat style may be comfortable for one person but nearly impossible for another. Rather than riding this out, watch the one-minute video below for a quick and dirty way to find your best hip position. If you don’t have the time to watch the video, know this: your strongest position for squatting is probably where it’s most comfortable, whether that means wide with your toes out, narrow with your toes in, or anywhere in between. This is where you get to be a special snowflake and take the time to find what feels best for you.
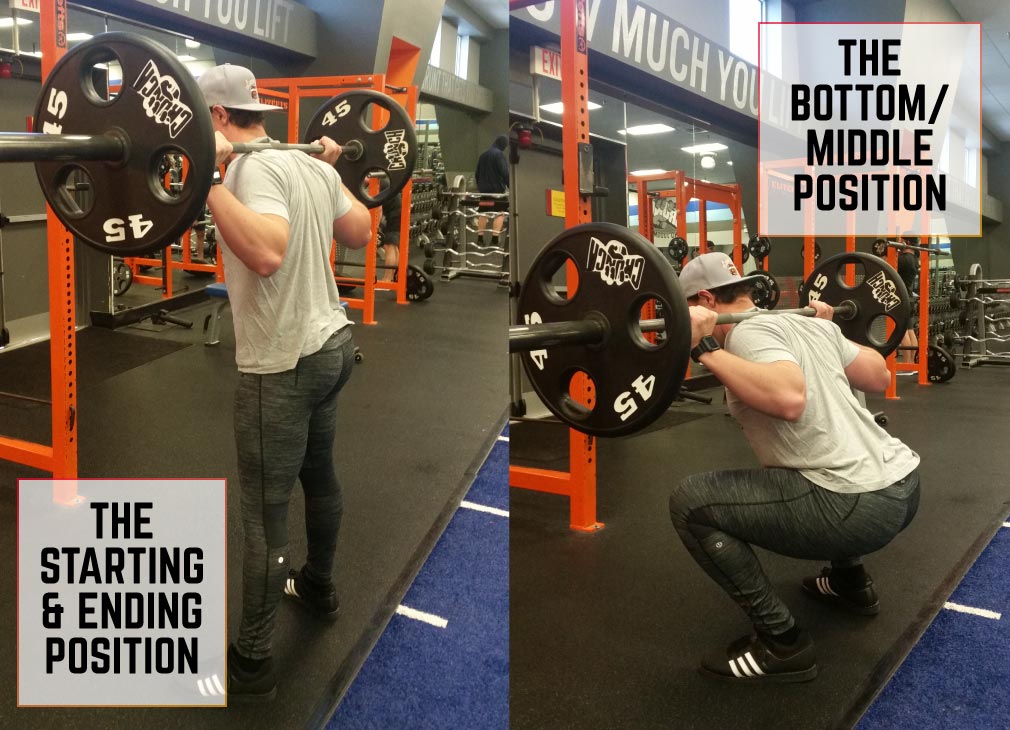
Actually Squatting
You’re breathing like you’ve never breathed before. You’re standing in the perfect braced position for your body and all of your joints are right where you want them to be. So now the question is, “how the heck do I actually get down and back up?”
It’s really quite simple.
You’re either going to bend at the knees first, at the hips first, or try to do both at the same time. This is another “do what feels best for you” situation. Some believe the joint you move first will carry the most weight through the rest of the movement, but there’s no research to back up this claim. Until there’s some research to tell us otherwise, do what seems right for you!
A common issue people have when squatting for the first time is not sitting back far enough, usually because they are hyper-focused on not rounding over or falling. The reality is when you sit down to a chair you’re performing a pretty mechanically-sound squat. If you can’t hit proper depth because you’re scared of not having something there to catch you, squat down to a box and progressively make it lower until you are confident enough to squat to at least where your thigh is parallel to the floor.
Another common myth that’s been passed around is that allowing your knees to pass your toes when you squat will leave you broken and unable to walk again. Luckily, this has been looked at and it turns out this claim is false—your knees will not explode if your knees go past your toes! In fact, one study found that if you limit the amount your knees bend you will bend more at the hips; doing so significantly increases the stress on your lower back compared to naturally letting your knees go where they need to go [10]. So don’t sweat it, and again, do what’s comfortable!
Standing back up is the simplest part—you just stand back up! If there is anything to think about during this portion of the lift it would be driving your traps back into the bar while trying to press your feet down through the floor.
Final Thoughts
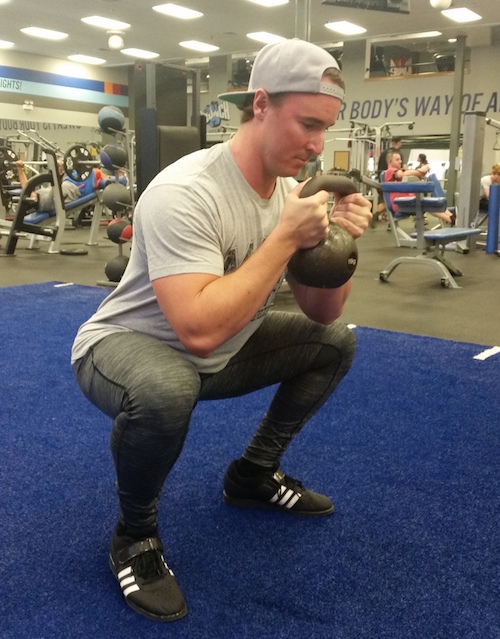
Performing a goblet squat
You’ve re-engineered your breathing, learned how to brace and set the perfect neutral position, and performed the perfect squat… well, maybe not perfect yet. While this is a very general guide to all things squat, there are still many details that can be addressed and fixes to be made. But you should now have the toolkit to start squatting safely.
If you’ve never squatted with a barbell before, it may be best to progress your way up. Start with goblet squats and slowly work your way to putting the bar on your back. The goblet squat is a more natural movement that forces you to stabilize at the core as the weight is in front of you rather than sitting on your back. This can help reduce your learning curve.
In the end, it’s important to remember that squatting is a basic functional human movement that is easy to bog-down with over-analysis. Perfecting movement is a never-ending chase, but at the end of the day, human movement is meant to be relatively thoughtless. With enough practice, your squat will be, too!